|
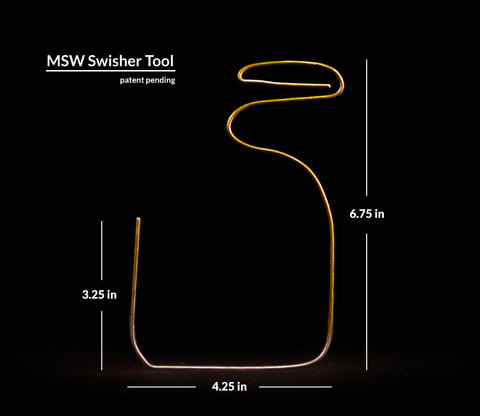
Threading Chain On Swisher Tool
- Lay chain on clean, flat surface, outer plate side down (as opposed to roller side down orientation on bike)
- Thread wire through first outer link in chain (first inner link will rest above wire, see picture where we’ve positioned it standing). Note: only thread wire through outer links; they are wider and allow more space for wire to pass through.
- Count seven outer links down, cross over with eighth outer link, then count seven outer links up and thread wire through seventh link, completing first column
- Thread wire through next, adjacent outer link to start second column downward (inner link between two outer links will rest horizontally above wire) and repeat counting down seven outer links, crossing over with eighth outer link, and up seven outer links to complete second column by threading seventh link
- Repeat process to create third and fourth columns. Note: first three columns should be even in length; fourth column will be shorter as in picture and should end with inner link resting (standing in pic) above wire. This last inner link will be placed on nail when chain is removed from SC and hung to cool
- Suggestion: practice removing chain from tool by placing first link on nail and unfurling before proceeding with waxing steps.
- Continue with step #6 from previous waxing instructions page
Notes:
- The seven link column length is optimal for small SC’s (great swishing action but few tangles when removing chain). It is important to have the first three columns equal in length and the last shorter for reducing tangles. Tip: if your chain tangles frequently during swishing or removal, check for stiff links.
- When lowering chain and Swisher Tool into SC on top of non-melted wax, allow chain to lie horizontal on top of wax while standing tool upright (top part of tool will stick out of pot approximately two inches); when lowering chain into SC that contains melted wax, wiggle tool back and forth until chain is completely submerged before beginning swishing.
- It’s possible to thread the chain onto the Swisher Tool by hand without resting the chain on a flat surface, but initially it’s faster to use a table or counter.
-
Titanium can be used to build your Swisher but we don’t recommend carbon.
|


